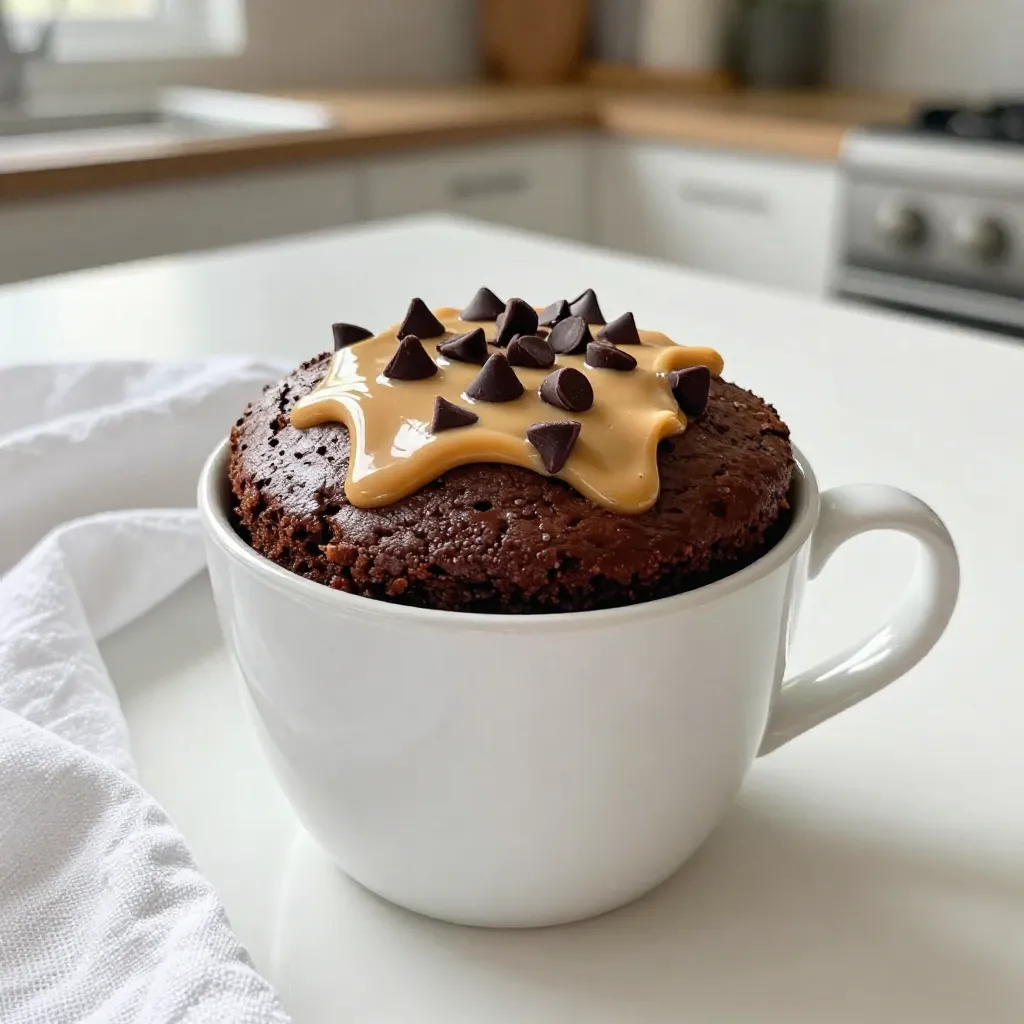
Craving a sweet treat but short on time? This Chocolate Peanut Butter Mug Cake is your answer! In just minutes, you can whip up a delicious dessert that combines rich chocolate and creamy peanut butter. You’ll love how simple it is, plus I’ll share tips to make it even tastier. Let’s dive into this quick and tasty dessert that satisfies any sweet tooth!
Why I Love This Recipe
- Quick and Easy: This mug cake can be whipped up in just 5 minutes, making it perfect for a last-minute dessert fix.
- Decadent Flavor: The combination of chocolate and peanut butter creates a rich, indulgent flavor that satisfies sweet cravings.
- Single Serving: Perfectly portioned for one, this recipe allows you to enjoy a treat without the temptation of leftovers.
- Customizable: Add your favorite mix-ins like chocolate chips or nuts to create a personalized dessert experience.
Ingredients
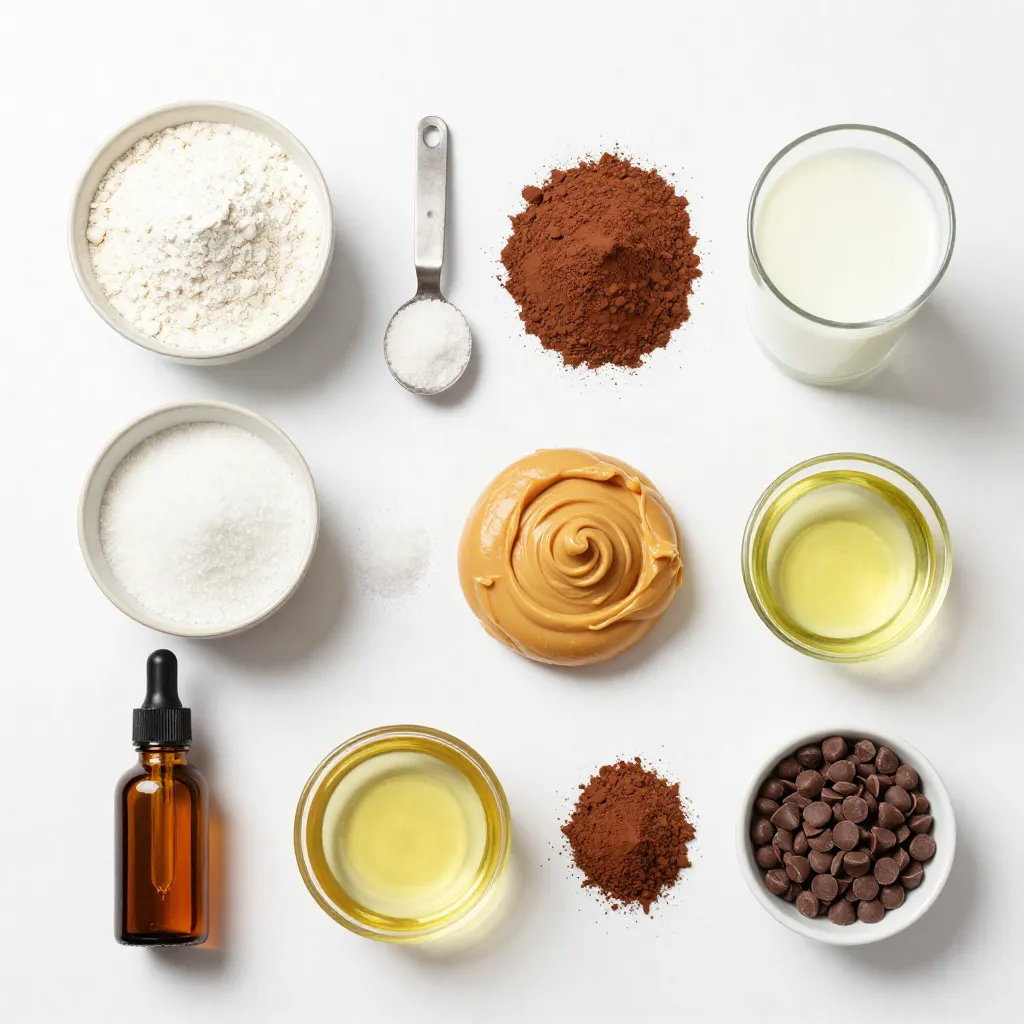
List of essential ingredients
To make the perfect Chocolate Peanut Butter Mug Cake, you need these key ingredients:
– 4 tablespoons all-purpose flour
– 4 tablespoons granulated sugar
– 2 tablespoons unsweetened cocoa powder
– 1/8 teaspoon baking powder
– 1/8 teaspoon salt
– 3 tablespoons milk (any kind)
– 2 tablespoons peanut butter
– 1 tablespoon vegetable oil
– 1/4 teaspoon vanilla extract
These ingredients work together to create a rich, moist cake right in your mug.
Optional ingredients to enhance flavor
You can make this mug cake even better by adding:
– Chocolate chips for extra chocolatey goodness
– A sprinkle of sea salt for a sweet-salty mix
– A dollop of whipped cream for a creamy finish
These optional ingredients can elevate your dessert and make it more fun.
Ingredient substitution options
If you don’t have some ingredients, here are easy swaps:
– Use whole wheat flour instead of all-purpose flour for added fiber.
– Swap granulated sugar with brown sugar for a deeper flavor.
– You can use any nut butter instead of peanut butter, like almond or cashew.
– If you want a dairy-free option, try almond milk or coconut milk.
These substitutions allow you to customize the cake while keeping it delicious.
Step-by-Step Instructions
Preparing the dry ingredients
First, grab a large microwave-safe mug. It should hold about 12 ounces. Add the dry ingredients:
– 4 tablespoons all-purpose flour
– 4 tablespoons granulated sugar
– 2 tablespoons unsweetened cocoa powder
– 1/8 teaspoon baking powder
– 1/8 teaspoon salt
Mix these ingredients well with a fork. Make sure there are no lumps. This step sets the base for your cake.
Mixing the wet ingredients
Next, add the wet ingredients to your dry mix:
– 3 tablespoons milk (any kind)
– 2 tablespoons peanut butter
– 1 tablespoon vegetable oil
– 1/4 teaspoon vanilla extract
Stir everything until it forms a smooth batter. You want it creamy and lump-free. If you like chocolate chips, add a few now. They will melt and make your cake even richer.
Microwaving the mug cake
Now comes the fun part. Place your mug in the microwave. Cook it on high for 40 to 60 seconds. Start checking it at 40 seconds. The cake should be set but still moist in the center. Cooking times can change based on your microwave’s power. You might need to adjust the time a bit.
Carefully take the mug out of the microwave. It will be hot! Let it cool for one minute. Now, you can dig in. If you want a special touch, top it with whipped cream or a drizzle of melted peanut butter. Enjoy your quick and tasty dessert!
Tips & Tricks
How to ensure the perfect texture
To get the best texture in your mug cake, mix your dry and wet ingredients well. Make sure there are no lumps. A smooth batter leads to a fluffier cake. Use a microwave-safe mug that holds at least 12 ounces. This size gives the cake space to rise. When microwaving, check at 40 seconds. The cake should look set but still soft in the center. If it cooks too long, it can become tough.
Common mistakes to avoid
One common mistake is overmixing the batter. This can make the cake dense. Also, don’t skip the baking powder; it helps the cake rise. Be careful not to overcook it; every microwave varies. Start with 40 seconds, then check. If your mug is too small, the batter might overflow. Always choose a large enough mug to prevent spills.
Tips for customizing your mug cake
You can change up the flavors easily. Try adding vanilla extract or almond extract for a twist. If you love chocolate, mix in some chocolate chips. You can also use different nut butters, like almond or cashew. To make it healthier, swap out sugar for a sweetener. You can also replace regular flour with almond or oat flour for a gluten-free option. The fun part is making it your own!
Pro Tips
- Use a Larger Mug: Opt for a mug that holds at least 12 oz to prevent overflow during microwaving.
- Check Your Microwave: Microwaves vary in power; start with 40 seconds and add time if necessary for a perfectly set center.
- Experiment with Toppings: Enhance your mug cake with various toppings like whipped cream, melted chocolate, or crushed nuts for added flavor.
- Let It Cool: Allow the mug cake to cool for a minute before eating; this helps the texture firm up and makes it easier to enjoy.
Variations
Alternative flavors (e.g., vanilla, almond)
You can change the flavor of your mug cake easily. Try using vanilla extract instead of the regular one. This gives a sweet, warm taste. Almond extract adds a nutty twist that pairs well with chocolate. You can also add a bit of almond flour for a fun texture.
Different toppings and add-ins
Toppings can take your mug cake to the next level. A scoop of ice cream on top makes it a treat. You can add whipped cream for a light touch. Drizzling melted chocolate or extra peanut butter adds richness. You might also try adding nuts or berries for extra flavor and crunch.
Gluten-free and dairy-free options
You can make this cake fit many diets. Use almond flour or coconut flour instead of regular flour for a gluten-free option. For dairy-free, try almond milk or oat milk instead of regular milk. Look for dairy-free chocolate chips if you want to add chocolate. These swaps keep the taste great while fitting your needs.
Storage Info
Best practices for storing leftovers
If you have leftover chocolate peanut butter mug cake, store it in an airtight container. This keeps the cake fresh and moist. Allow the cake to cool completely before sealing it. You can keep it at room temperature for one day. If you want it to last longer, place it in the fridge for up to three days.
How to reheat for optimal taste
To reheat, use the microwave for about 10 to 15 seconds. This warms it up without drying it out. If it feels too cold, add a few more seconds. You can also add a tiny splash of milk while reheating. This adds moisture and keeps the cake soft.
Shelf life of ingredients
The ingredients in this mug cake vary in shelf life. All-purpose flour can last for one year if stored properly. Granulated sugar has an indefinite shelf life when kept dry. Cocoa powder can last up to two years. Peanut butter usually stays fresh for six months after opening, especially if you store it in the fridge. Always check for any signs of spoilage before using.
FAQs
What is the cooking time for different microwaves?
The cooking time for this mug cake varies. Most microwaves cook in 40 to 60 seconds. Lower wattage microwaves may need more time. Higher wattage microwaves might cook it faster. Always start checking at 40 seconds. The cake should be firm but soft in the center. If it’s too wet, give it another 10 seconds.
Can I make this mug cake in advance?
You can mix the dry ingredients ahead of time. Just store them in a sealed container. When you’re ready to eat, add the wet ingredients and microwave. I don’t recommend making the whole cake in advance. It tastes best when fresh and warm.
How do I make a larger batch?
To make a larger batch, use a bigger bowl instead of a mug. Multiply each ingredient by the number of servings you want. For example, double the ingredients for two cakes. Mix everything in the bowl, then divide it into mugs. Microwave each mug separately. This keeps the texture perfect for each serving.
You now have all the tools to make a fantastic mug cake. We covered key ingredients, helpful steps, and great tips for the best results. Remember, little changes can boost flavor. Don’t forget to store any extras right to keep them fresh. Try different flavors and toppings to find your favorite. This treat is easy to make, so enjoy experimenting. Have fun baking, and impress yourself with your tasty mug cake creation