Are you ready to enjoy a fresh batch of Cranberry Orange Scones? This flavorful and easy recipe is perfect for breakfast, snacks, or a cozy tea time. With the bright taste of cranberries and zesty oranges, these scones will delight your taste buds. I’ll guide you step-by-step, from gathering ingredients to baking your perfect scones. Let’s dive into the world of scone-making and create something delicious together!
Why I Love This Recipe
- Delicious Flavor Combination: The tartness of cranberries paired with the bright zest of orange creates a refreshing and delightful taste in every bite.
- Quick and Easy: With just 15 minutes of prep time, these scones are perfect for a last-minute brunch or afternoon tea.
- Perfect Texture: The combination of cold butter and buttermilk ensures these scones are flaky on the outside while remaining tender and moist on the inside.
- Customizable: This recipe serves as a great base, allowing you to swap in different dried fruits or citrus zest for a unique twist each time.
Ingredients
List of Ingredients
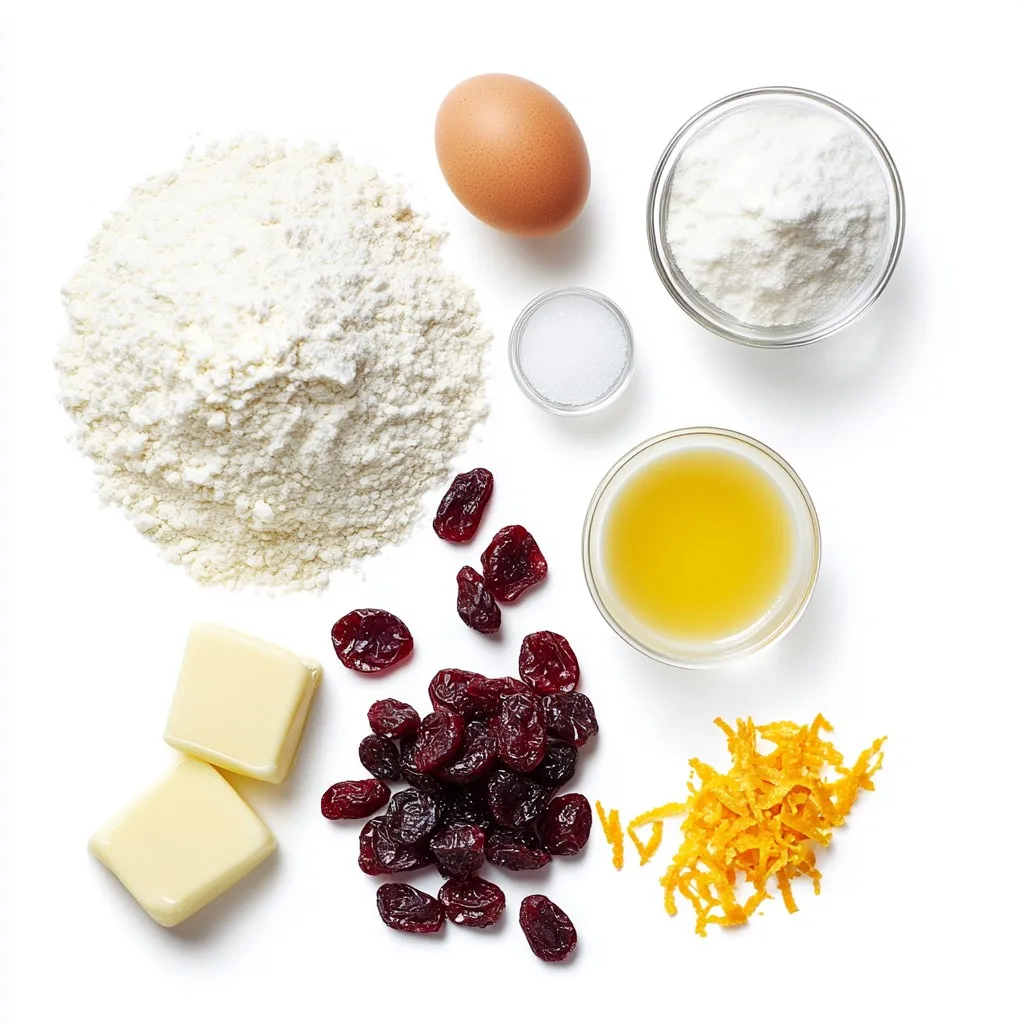
To make these tasty cranberry orange scones, you will need:
– 2 cups all-purpose flour
– 1/3 cup granulated sugar
– 1 tablespoon baking powder
– 1/2 teaspoon salt
– 1/2 cup unsalted butter, cold and cubed
– 1 cup dried cranberries
– Zest of 1 orange
– 1/2 cup buttermilk
– 1 large egg
– 1 teaspoon vanilla extract
– 1 tablespoon additional sugar for topping
Measuring Tips
Accurate measurements make a big difference. Use dry measuring cups for flour and sugar. Level off the top with a flat edge. For sticky items like buttermilk, use a liquid measuring cup. Always use cold butter. It helps create flaky scones.
Recommended Brand Suggestions
For best results, I recommend these brands:
– All-purpose flour: King Arthur Flour
– Granulated sugar: Domino Sugar
– Baking powder: Rumford
– Unsalted butter: Land O’Lakes
– Dried cranberries: Ocean Spray
These brands provide consistent quality and great flavors. Try them for your scones!
Step-by-Step Instructions
Preparation Steps
1. Start by preheating your oven to 400°F (200°C). This helps the scones rise well.
2. Line a baking sheet with parchment paper. This keeps the scones from sticking.
3. In a large mixing bowl, whisk together 2 cups of flour, 1/3 cup of sugar, 1 tablespoon of baking powder, and 1/2 teaspoon of salt. Mix until even.
4. Next, add 1/2 cup of cold, cubed butter to the bowl. Use a pastry cutter or your fingers to blend it. You want the mix to look like coarse crumbs.
5. Stir in 1 cup of dried cranberries and the zest of 1 orange. This adds great flavor and color.
Baking Techniques
6. In a separate bowl, mix 1/2 cup of buttermilk, 1 large egg, and 1 teaspoon of vanilla extract.
7. Pour this wet mix into the dry bowl. Stir gently until just combined. Do not overmix; it can make the scones tough.
8. Turn the dough out onto a floured surface. Pat it into a circle about 1 inch thick.
9. Cut the dough into 8 wedges. Place them on the prepared baking sheet. Make sure to leave space between each scone.
10. Sprinkle 1 tablespoon of sugar on top of the scones for a nice crunch.
Tips for Perfectly Baked Scones
11. Bake the scones for 15 to 20 minutes. They should be golden brown when done.
12. To check, insert a toothpick into the center. It should come out clean.
13. Remove the scones from the oven and let them cool slightly on a wire rack. Serve them warm for the best taste!
Tips & Tricks
Common Mistakes to Avoid
When making cranberry orange scones, a few common mistakes can happen. First, don’t overmix the dough. Overmixing can make the scones tough. Mix just until combined for soft scones. Second, use cold butter. If the butter is warm, your scones won’t rise well. Lastly, don’t skip the zest. The zest adds a bright flavor.
How to Achieve Fluffy Scones
To make your scones fluffy, you need to keep everything cold. Start with cold butter and buttermilk. This helps create steam when baking. Also, handle the dough gently. Pat it out instead of rolling it. This keeps the air in the dough, making it rise nicely.
Flavor Enhancements
You can add more flavor to your scones. Try adding chopped nuts, like walnuts or pecans. They provide a great crunch. You can also mix in chocolate chips or orange extract for extra sweetness. A glaze made of powdered sugar and orange juice can add a nice finish.
Pro Tips
- Use Cold Ingredients: Ensure your butter and buttermilk are cold to achieve a flaky texture in your scones.
- Don’t Overmix: Mix the wet and dry ingredients just until combined to prevent tough scones.
- Cut Even Wedges: For uniform baking, be sure to cut the dough into evenly sized wedges.
- Experiment with Flavors: Try adding different citrus zest or nuts for unique flavor variations in your scones.
Variations
Alternative Dried Fruits
You can switch out cranberries for other dried fruits. Dried cherries or apricots add a nice twist. Each fruit brings its own taste and texture. For example, cherries add a tart flavor, while apricots are sweeter. Just make sure to chop larger fruits into smaller pieces. This helps them mix well into the dough.
Gluten-Free Options
If you need a gluten-free scone, I recommend using a gluten-free flour blend. Look for blends that have xanthan gum for the best texture. You might also need to adjust the liquid in the recipe. Start with the same amount of buttermilk, then add more if needed. The dough should feel soft but not sticky.
Flavor Pairings with Spices
Adding spices can enhance your scones. Cinnamon, nutmeg, or cardamom work great with cranberries and orange. Just a pinch of each can add warmth and depth. Mix these spices into the dry ingredients for even flavor. You can also add a bit of ginger for a nice kick. Experiment and find your favorite flavor combinations.
Storage Info
Best Practices for Storing Scones
To keep your scones fresh, store them in an airtight container. This will help keep moisture in, which keeps the scones soft. Place a piece of parchment paper between layers if you stack them. This prevents them from sticking together. Enjoy your scones within two days for the best taste.
Freezing Instructions
You can freeze scones for later enjoyment. To freeze, wrap each scone in plastic wrap. Then, place them in a freezer bag or container. Label the bag with the date. They can last up to three months in the freezer. When you want to eat one, let it thaw in the fridge overnight.
Reheating Tips
To reheat your scones, preheat your oven to 350°F (175°C). Place the scones on a baking sheet. Bake for about 10 minutes until warm. This will help bring back the fresh-baked taste. You can also use a microwave. Heat for about 15-20 seconds. This is quicker but may not keep the scone’s crispness.
FAQs
Can I substitute buttermilk?
Yes, you can substitute buttermilk. If you don’t have it, you can make a quick version. Mix 1/2 cup of milk with 1/2 tablespoon of vinegar or lemon juice. Let it sit for about five minutes. This will give you a similar tangy flavor and acidity.
How do I know when the scones are done?
You will know the scones are done when they turn golden brown. Insert a toothpick into the center of a scone. If it comes out clean, they are ready. The baking time is usually 15-20 minutes, but keep an eye on them.
Can these scones be made ahead of time?
Yes, you can make these scones ahead of time. You can prepare the dough, cut it into wedges, and freeze them. Just place them on a baking sheet and freeze until firm. Then, store them in a freezer bag. When you’re ready to bake, add a few extra minutes to the baking time.
We covered the key ingredients, preparation steps, and tips for baking scones. You learned how to avoid common mistakes and make fluffy scones. Plus, we explored variations, storage, and answered your FAQs.
Now, you have all the tools to bake tasty scones. Enjoy experimenting with flavors and share your creations with others. Perfect scones await you in your kitche