If you love warm, tasty bread, you’ll adore this Garlic Herb Pull-Apart Bread recipe. It’s simple to make and packed with flavor that will impress your friends and family. I’ll guide you through each step, making it easy to enjoy this delicious treat at home. Plus, I’ll share tips to perfect the dough and some fun variations. Let’s get started on your new favorite bread!
Why I Love This Recipe
- Flavorful Garlic Infusion: The combination of fresh garlic and herbs creates a rich and aromatic flavor that elevates this pull-apart bread to a whole new level.
- Easy to Share: This bread is perfect for gatherings, as it can be easily pulled apart and shared among friends and family, making it a great addition to any meal.
- Customizable Toppings: You can add your favorite cheeses or herbs, allowing you to personalize the recipe to your taste and preferences.
- Comfort Food at Its Best: Warm, buttery, and deliciously fragrant, this bread is the ultimate comfort food that brings warmth and joy to any dining experience.
Ingredients
List of Main Ingredients
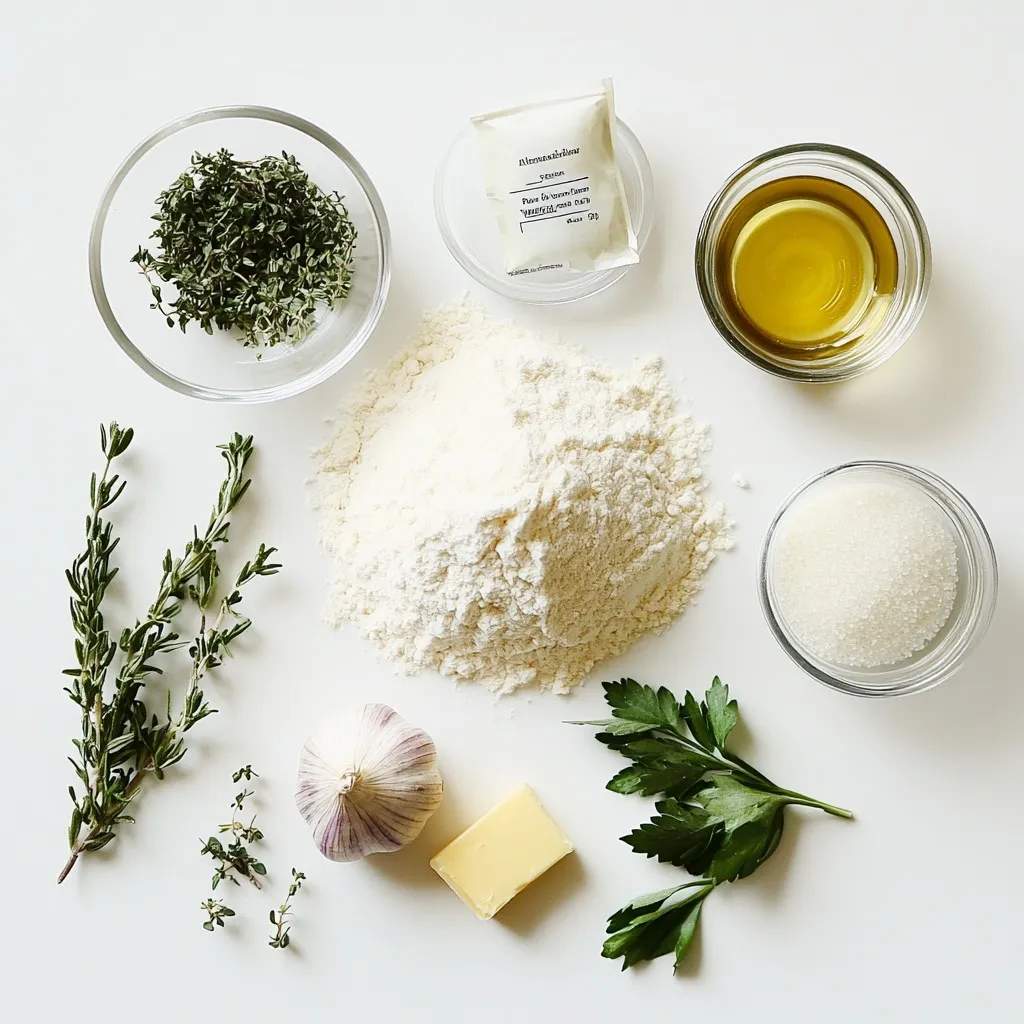
To make Garlic Herb Pull-Apart Bread, you need these main ingredients:
– 4 cups all-purpose flour
– 1 packet (2 ¼ teaspoons) active dry yeast
– 1 teaspoon sugar
– 1 ½ teaspoons salt
– 1 ½ cups warm water (110°F)
– 6 tablespoons unsalted butter, melted
– 4 cloves garlic, minced
– 2 tablespoons fresh parsley, finely chopped
– 1 tablespoon fresh rosemary, finely chopped
– 1 tablespoon fresh thyme leaves
– 1 teaspoon garlic powder
– ½ teaspoon onion powder
These ingredients create a soft and flavorful bread. The herbs bring freshness, while the garlic adds depth.
Optional Additions
You can enhance your pull-apart bread with these optional ingredients:
– Grated Parmesan cheese for topping
– Fresh herbs like oregano or basil
– A sprinkle of crushed red pepper for heat
These additions can elevate the flavor and make the bread even more special.
Ingredient Substitutes
If you need substitutes, here are some helpful ideas:
– Use bread flour instead of all-purpose flour for a chewier texture.
– Instant yeast can replace active dry yeast; just mix it with the dry ingredients.
– Olive oil can stand in for melted butter for a different flavor.
– Dried herbs can replace fresh ones; use about one-third the amount.
These substitutes can help you adapt the recipe based on what you have at home.
Step-by-Step Instructions
Preparing the Yeast Mixture
Start by mixing warm water, yeast, and sugar in a small bowl. The water should be about 110°F. Let it sit for 5 to 10 minutes. You will see bubbles form on top. This shows the yeast is active and ready to use.
Making the Dough
In a big mixing bowl, add the flour and salt. Make a well in the center. Pour in the yeast mixture and 3 tablespoons of melted butter. Mix until a dough forms. Knead it on a floured surface for 5 to 7 minutes. The dough should feel smooth and elastic. Place it in a greased bowl, cover it, and let it rise in a warm spot for about 1 hour. It should double in size.
Shaping the Pull-Apart Bread
After the dough rises, punch it down to release air. Turn it out onto a floured surface. Divide the dough into 12 equal pieces and roll each into a ball. In a small bowl, mix the rest of the melted butter with garlic and herbs. Dip each dough ball into this mix, coating it well. Then, place the balls in a greased bundt pan or baking dish. Once arranged, pour any extra herb butter on top. Cover the pan and let it rise again for 30 to 40 minutes. Preheat your oven to 375°F. Bake for 25 to 30 minutes until golden brown. Optionally, sprinkle Parmesan cheese on top while warm.
Tips & Tricks
Perfecting the Dough Texture
To get the best dough, use warm water. It should be about 110°F. This helps the yeast grow. If the water is too hot, it can kill the yeast. Knead the dough for 5-7 minutes until it feels smooth. This makes the dough elastic and easy to pull apart. Let it rise in a warm spot. The dough should double in size. This step is key for a fluffy bread.
Enhancing Flavor with Herbs
Use fresh herbs for the best taste. I love using parsley, rosemary, and thyme. These herbs add a nice touch of flavor. Mince the garlic finely to release its aroma. The garlic powder and onion powder boost the taste, too. Mix all herbs in melted butter before dipping the dough. This ensures each piece is full of flavor.
Baking Tips for Golden Brown Bread
Bake at 375°F for 25-30 minutes. Check the bread when it smells amazing. It should be golden brown on top. If it looks pale, it may need more time. Once baked, let it cool slightly. This helps the bread set. For a special touch, add grated Parmesan cheese on top while it’s warm. This melts beautifully and adds a savory flavor.
Pro Tips
- Proof Your Yeast: Always ensure your yeast is fresh. If your yeast mixture doesn’t become frothy after 10 minutes, it may be expired, and you should start over for the best results.
- Customize Your Herbs: Feel free to mix and match herbs according to your preference. Basil, oregano, or even a bit of sage can add a delightful twist to the flavor profile.
- Don’t Rush the Rising: Allowing the dough to rise properly is crucial for achieving a fluffy texture. If your kitchen is cold, consider placing it in a warm spot, like near an oven that’s turned off.
- Serve with Style: Enhance the presentation by serving the bread in a rustic way. Pair it with a small bowl of olive oil infused with herbs or a sprinkle of sea salt for an inviting touch.
Variations
Cheese-Stuffed Garlic Herb Pull-Apart Bread
You can add cheese for a tasty twist. Use mozzarella or cheddar cheese. Just take some cheese cubes and place them inside each dough ball before coating them in the herb butter. When you bake the bread, the cheese will melt, creating a gooey center. This version is a crowd-pleaser!
Spicy Garlic Herb Version
If you love heat, try adding red pepper flakes. Mix a teaspoon of red pepper flakes into the herb butter. This gives a nice kick to the bread. You can also add some diced jalapeños for extra spice. Adjust the amount to your taste, and enjoy the bold flavors.
Gluten-Free Options
To make this bread gluten-free, use a gluten-free flour blend. Ensure the blend has xanthan gum for better texture. Follow the same steps in the recipe, but be sure to check the baking time. The bread may need more time to bake. Always check for a golden-brown color to know it’s ready!
Storage Info
Best Storage Practices
To keep your Garlic Herb Pull-Apart Bread fresh, store it properly. Let the bread cool completely before wrapping it. Use plastic wrap or foil to cover it tightly. This helps keep the bread soft and moist. Keep it at room temperature for up to 2 days. If you need to store it longer, refrigeration is not the best choice. It can dry out quickly in the fridge.
Reheating Instructions
When you’re ready to enjoy your bread again, reheating is simple. Preheat your oven to 350°F (175°C). Remove the bread from any wrapping and place it on a baking sheet. Cover it with foil to prevent it from browning too much. Heat for about 10-15 minutes, or until warm. You can also microwave a piece for about 15-20 seconds, but the oven gives better results.
Freezing for Later Use
Freezing is a great option if you want to save some bread for later. Once the bread is completely cool, slice it into portions. Wrap each piece tightly in plastic wrap and then in foil. This double wrapping helps prevent freezer burn. Place the wrapped pieces in an airtight freezer bag. They can last for up to 3 months in the freezer. When you’re ready to eat, thaw the bread in the fridge overnight and then reheat in the oven.
FAQs
How can I make Garlic Herb Pull-Apart Bread ahead of time?
You can make this bread ahead of time by preparing the dough and letting it rise. After the first rise, shape the dough into balls and place them in the pan. Cover the pan and store it in the fridge for up to 24 hours. When you’re ready, let it sit at room temperature for 30-60 minutes before baking. This way, the bread will still be fresh and fluffy.
Can I use a bread machine for this recipe?
Yes, you can use a bread machine for this recipe. Add the warm water, yeast, sugar, and melted butter first. Then, add the flour and salt according to your machine’s instructions. Set the machine to the dough cycle. Once the dough is ready, follow the steps to shape and bake the bread as usual. It makes the process easier and saves time.
What can I serve with Garlic Herb Pull-Apart Bread?
Garlic Herb Pull-Apart Bread pairs well with many dishes. You can serve it with soups, salads, or stews. It’s also great with dips like marinara or garlic butter. If you want a fun twist, serve it with cheese spreads or herbed olive oil. This bread is perfect for sharing and complements a variety of flavors.
In this blog post, we covered how to make Garlic Herb Pull-Apart Bread. We explored key ingredients, step-by-step instructions, and tips for the best results. You learned about fun variations and storage methods, so your bread stays fresh. Remember, with a few tweaks, you can make it your own. I hope you feel inspired to try this recipe. Enjoy the process and share the bread with friends. Happy bakin