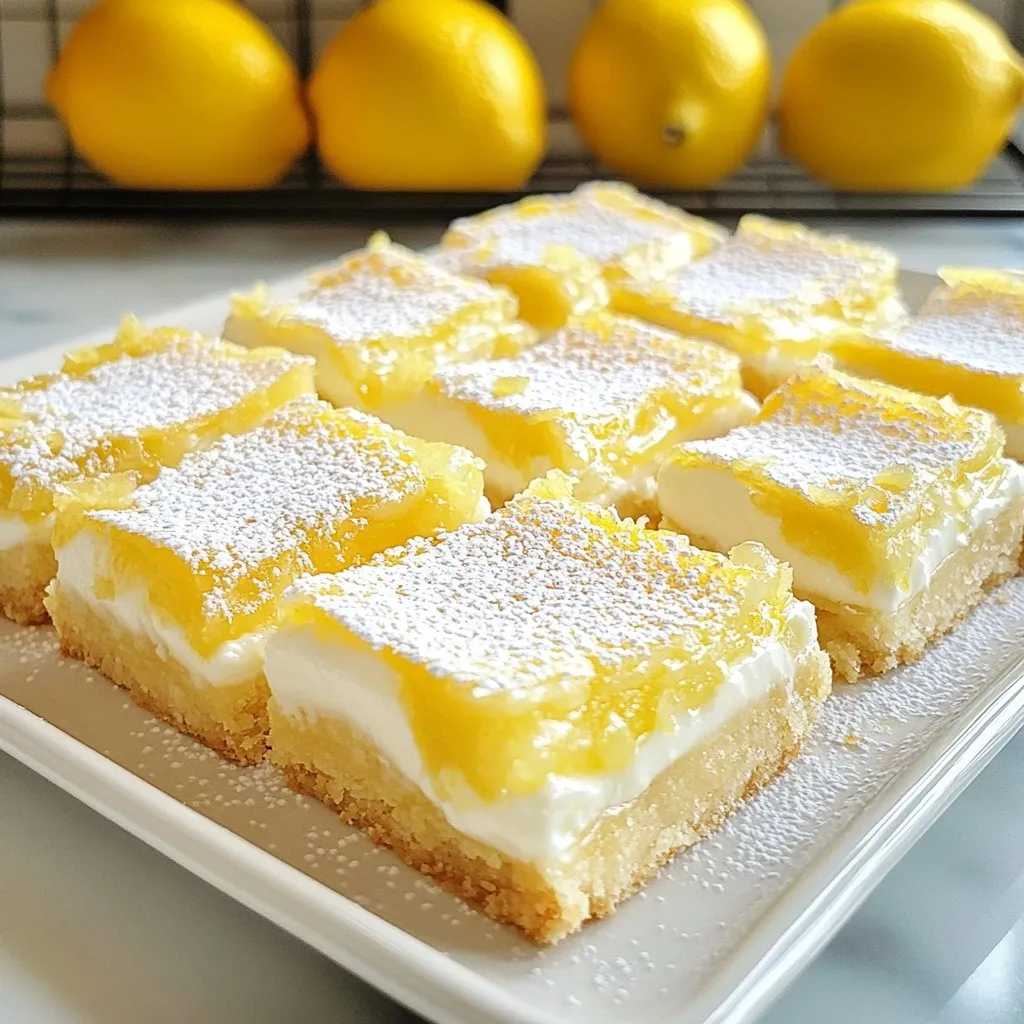
If you love a sweet and tangy treat, Greek Yogurt Lemon Bars are for you! These easy and delightful bars pack a punch of flavor and a boost of nutrition. Using Greek yogurt not only makes them creamy but also adds protein. In this blog post, I’ll guide you through the simple steps to make them, share tips for the best results, and explore delicious variations. Let’s get baking!
Why I Love This Recipe
- Bright and Tangy Flavor: These lemon bars are bursting with fresh lemon flavor, making them perfect for a refreshing dessert.
- Healthy Twist: Using Greek yogurt not only adds creaminess but also boosts the protein content, providing a healthier alternative to traditional lemon bars.
- Easy to Make: This recipe comes together quickly with minimal ingredients, making it ideal for both beginner and experienced bakers.
- Versatile Serving Options: These bars can be enjoyed on their own, dusted with powdered sugar, or garnished with fresh fruit for an elegant presentation.
Ingredients
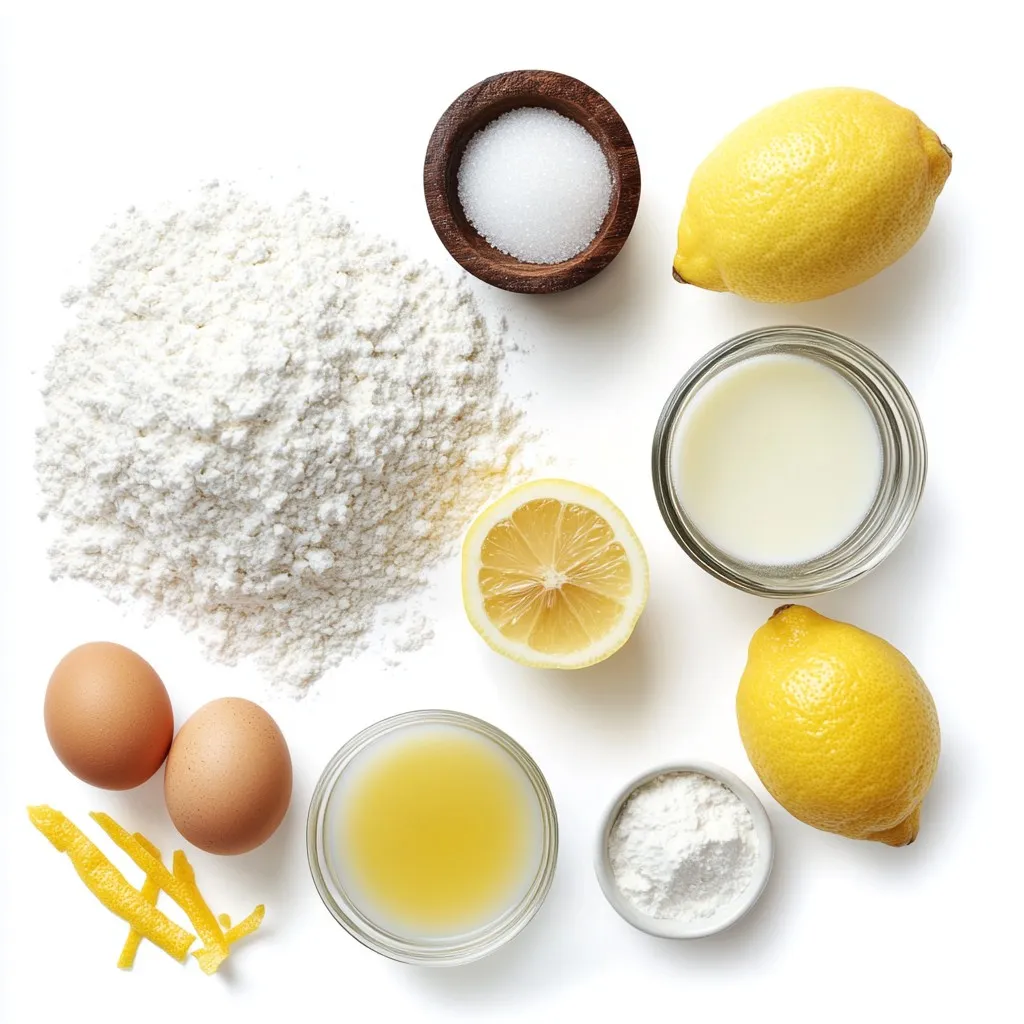
Key Ingredients for Greek Yogurt Lemon Bars
To make Greek yogurt lemon bars, you need a few key ingredients. Here’s what you’ll need:
– 1 cup all-purpose flour
– 1/2 cup powdered sugar
– 1/4 cup cornstarch
– 1/2 teaspoon salt
– 1/2 cup unsalted butter, melted
– 1 cup Greek yogurt
– 1 cup granulated sugar
– 3 large eggs
– 1/4 cup fresh lemon juice (about 2 lemons)
– Zest of 2 lemons
– 1 teaspoon vanilla extract
– Optional: Extra powdered sugar for dusting
These ingredients come together to create a smooth filling and a crumbly crust. The Greek yogurt adds a creamy texture and a delightful tang.
Substitutions for Key Ingredients
You can easily swap some ingredients if needed. Here are a few substitutions:
– All-purpose flour: You can use whole wheat flour for added fiber.
– Powdered sugar: You can make your own by blending granulated sugar until fine.
– Unsalted butter: Coconut oil or vegan butter works well for a dairy-free option.
– Greek yogurt: Regular yogurt or dairy-free yogurt can replace Greek yogurt.
– Granulated sugar: You can use honey or maple syrup for a natural sweetener.
These swaps allow you to customize the bars to fit your diet or preferences.
Nutritional Benefits of Using Greek Yogurt
Greek yogurt is a star ingredient in this recipe. It offers many nutritional benefits:
– High in protein: Greek yogurt packs more protein than regular yogurt.
– Probiotics: It helps with digestion and gut health.
– Calcium: It is a good source of calcium for strong bones.
– Lower in sugar: Greek yogurt often has less sugar than other creamy options.
Using Greek yogurt makes these lemon bars a bit healthier. You can enjoy them without the guilt!
Step-by-Step Instructions
Preparation Steps for the Crust
To start, preheat your oven to 350°F (175°C). Grease an 8×8 inch baking dish or line it with parchment paper. This makes it easy to remove the bars later. In a medium bowl, whisk together 1 cup of all-purpose flour, 1/2 cup of powdered sugar, 1/4 cup of cornstarch, and 1/2 teaspoon of salt. Make sure everything mixes well. Next, pour in 1/2 cup of melted unsalted butter. Mix until the texture is crumbly. Now, press this mixture evenly into the bottom of your baking dish.
Making the Greek Yogurt Filling
In a large bowl, gather the main star: 1 cup of Greek yogurt. Add in 1 cup of granulated sugar, 3 large eggs, 1/4 cup of fresh lemon juice, and the zest of 2 lemons. Don’t forget 1 teaspoon of vanilla extract! Whisk this mixture until it becomes smooth and creamy. This filling is what makes the bars so delicious. Pour the yogurt filling over the crust, spreading it evenly.
Baking and Cooling Process
Now, return the baking dish to the oven. Bake for 25-30 minutes. The filling should be set and firm to the touch. Once baked, take the dish out of the oven and let it cool completely at room temperature. After that, place it in the fridge for at least 2 hours. This helps the bars set perfectly. When ready, cut them into squares. Dust with powdered sugar if you like. Enjoy your Greek yogurt lemon bars!
Tips & Tricks
How to Achieve the Perfect Crust
To get a great crust, mix your dry ingredients well. Combine flour, powdered sugar, cornstarch, and salt in a bowl. Then, add melted butter and stir until crumbly. Press this mixture firmly into the bottom of your baking dish. Bake at 350°F for 15-20 minutes. You want it golden but not too dark. Let it cool slightly before adding the filling.
Tips for a Creamy Filling
For a creamy filling, use room-temperature Greek yogurt. This helps it mix smoothly with the sugar and eggs. Whisk everything together until it’s lump-free. Fresh lemon juice and zest give it a bright flavor. Make sure to pour the filling over the cooled crust. This helps keep the layers clear and neat.
Common Mistakes to Avoid
Avoid overmixing the filling. If you mix too much, it can become airy and lose that creamy texture. Also, don’t skip the cooling time for the crust. If you add the filling too soon, it might melt into the crust. Lastly, be patient when cooling the bars. Let them chill in the fridge for at least two hours to set properly.
Pro Tips
- Use Fresh Lemons: For the best flavor, always use fresh lemons instead of bottled lemon juice. The zest and juice from fresh lemons will elevate the taste of your lemon bars.
- Chill Before Serving: Allow the lemon bars to cool completely at room temperature, then refrigerate for at least 2 hours. This helps the filling to set properly and makes them easier to cut.
- Adjust Sweetness: If you prefer a less sweet dessert, you can reduce the amount of granulated sugar in the filling. Just be mindful that this may affect the texture slightly.
- Perfectly Cut Squares: For clean cuts, use a sharp knife and wipe it clean between cuts. This prevents the filling from sticking to the knife and gives you neat squares.
Variations
Flavor Variations: Citrus and Beyond
You can switch up the lemon flavor in your bars. Try using lime or orange for a fun twist. Blood oranges can add a vibrant hue and a sweet taste. You can even mix different citrus fruits for a bright, zesty flavor. If you love berries, add some mashed raspberries or blueberries. They give a nice contrast to the lemon. This makes the bars more colorful and tasty.
Gluten-Free Alternatives
If you need a gluten-free version, swap the all-purpose flour. Use a 1:1 gluten-free flour blend instead. Look for blends that contain xanthan gum for better texture. You can also use almond flour or coconut flour. Both will give you a unique flavor and a different texture. Don’t forget to adjust the baking time if needed. Watch for a golden color on the crust.
Dairy-Free Substitutions for Greek Yogurt
To make these bars dairy-free, use a plant-based yogurt. Look for coconut or almond yogurt for a rich flavor. These options work well to keep the bars creamy. You can also try silken tofu blended until smooth. This gives a nice texture and taste. Just make sure the yogurt is unsweetened to keep the balance right.
Storage Info
How to Store Greek Yogurt Lemon Bars
To keep your Greek yogurt lemon bars fresh, place them in an airtight container. You can stack the bars with parchment paper between layers. This method helps prevent sticking. Keep the bars in the fridge for up to five days. The coolness will keep them firm and tasty.
Best Practices for Freezing
If you want to save some for later, freezing is a great option. First, let the bars cool completely. Then, cut them into squares. Wrap each square in plastic wrap or foil. Place the wrapped bars in a freezer-safe bag or container. They can last in the freezer for up to three months. When you are ready to eat, thaw them in the fridge overnight.
Shelf Life and Reheating
These lemon bars taste best cold, but you can reheat them if you prefer. To reheat, place them in a preheated oven at 350°F (175°C) for about 10 minutes. This warms them gently without making them soggy. Enjoy them fresh from the oven or chilled from the fridge.
FAQs
Can I use regular yogurt instead of Greek yogurt?
Yes, you can use regular yogurt. However, Greek yogurt is thicker. This thickness gives the lemon bars a creamier texture. If you use regular yogurt, the bars may be a bit runny. You might want to strain regular yogurt in cheesecloth for a thicker result.
How do I know when the lemon bars are done baking?
The lemon bars are done when the filling is set. Gently touch the center; it should feel firm, not jiggly. The edges may pull away slightly from the pan. A slight golden color on top also shows they are ready.
What can I serve with Greek Yogurt Lemon Bars?
These lemon bars taste great with fresh fruit. Berries like strawberries or blueberries add a sweet touch. You could also serve them with whipped cream or a scoop of vanilla ice cream. A cup of tea or coffee pairs well too, making a nice treat.
Greek yogurt lemon bars combine bright flavors and healthy ingredients. You learned about key ingredients, plus tasty substitutions and nutritional perks. I shared step-by-step instructions to make your bars easy. Tips helped you avoid common mistakes and achieve the perfect texture. Variations allowed room for creativity. Storing tips ensure freshness for longer.
These bars are a delicious sweet treat you can feel good about! Try them today, and enjoy every bit